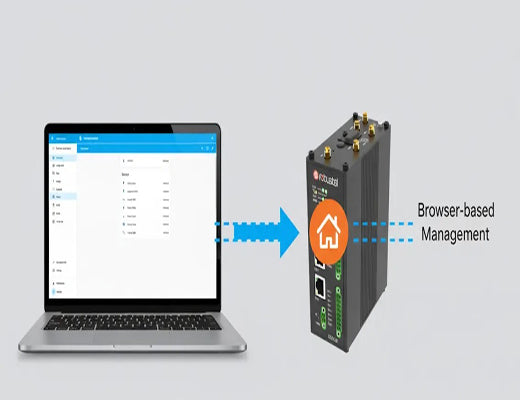
A diagram illustrating easy UI management of Home Assistant running on a Robustel EG5120 edge gateway.

How to install an file editor for Home Assistant on the EG5120

Written by: Jens Zhou

|

Published on

|

Time to read 5 min

Jens Zhou, Technical Support Engineer at Robustel

Jens Zhou is a Technical Support Engineer at Robustel, specializing in industrial IoT and edge gateway applications. He is experienced with the configuration and deployment of EG series devices, and well-versed in network communication, industrial protocols, and common wireless technologies. He is dedicated to providing practical tutorials to help engineers efficiently build smart systems.

Summary

This article provides a detailed, step-by-step guide on how to install a file editor within Home Assistant running on a Robustel EG5120 edge gateway.

By following these instructions, you'll be able to add a powerful UI-based editor.

This allows you to modify configuration.yaml and other critical files directly from your web browser without needing SSH or Samba access.

Introduction

If you're running Home Assistant on a powerful device like the Robustel EG5120, you already appreciate the benefits of a robust, industrial-grade platform. But let's be honest: isn't it frustrating when you need to make a quick tweak to your configuration.yaml and have to fire up an SSH client or navigate a network share? In my experience, these small interruptions can really break your workflow, especially when you're in the zone perfecting a new automation.

The real 'aha!' moment for many Home Assistant users is discovering they can manage everything, including the core configuration files, right from the dashboard. This guide is all about that moment. We're going to walk through how to install a user-friendly Home Assistant file editor, turning your EG5120 into a completely self-contained management hub. It's a simple change that makes the entire experience smoother and more efficient.

How to Install a Home Assistant File Editor on Your EG5120

Why You Need a File Editor in Home Assistant

Let's be clear: managing your Home Assistant instance effectively often means getting your hands dirty with YAML files. Whether you're adding new integrations, creating complex automations, or customizing your dashboard, the configuration.yaml file is your command center.


A dedicated Home Assistant file editor integrated into the UI brings several game-changing advantages:

  • Convenience: Edit files from any browser, on any device, without extra software.
  • Speed: Make quick changes and restart your instance in seconds. It's perfect for iterative testing and debugging.
  • Simplicity: Avoid the complexities of command-line editors or network file shares. The integrated editor provides a clean, straightforward interface.

This is especially true when running on an edge device like the EG5120. You've already invested in a powerful, always-on piece of hardware; why not make managing it as seamless as possible? You can learn more about the power of edge computing in our guide to industrial edge gateways.


A diagram illustrating easy UI management of Home Assistant running on a Robustel EG5120 edge gateway.

Prerequisites: What You'll Need

Before we jump into the fun part, let's quickly run through a checklist to make sure you've got everything ready to go. Trust me, getting these things in order first will make the whole process a breeze.

  • A Robustel EG5120 Gateway: This is our powerful industrial edge computing gateway where Home Assistant is running.
  • Home Assistant Installed and Running: This guide assumes you already have a functional Home Assistant instance on your EG5120. If not, you can refer to " How to Install Home Assistant on an Industrial IoT Gateway (EG5120)"
  • HACS (Home Assistant Community Store) Installed: The editor we're using is a custom component, and HACS is the easiest and safest way to manage it. If you don't have it yet, you can refer to " How to Install Home Assistant on an Industrial IoT Gateway (EG5120)"
  • Local Network Access: You'll need a computer connected to the same network as your EG5120 so you can access the Home Assistant web interface.
  • A Modern Web Browser: Chrome, Firefox, Safari, or Edge will work perfectly for accessing your dashboard.

Step-by-Step: Installing the Home Assistant File Editor

All set? Great, let's get this editor installed. I've broken down the process into easy-to-follow steps. We'll use the Home Assistant Community Store (HACS) for this, which is the standard way to add amazing community-developed integrations. If you haven't installed HACS yet, you'll need to do that first by following the official guide at the HACS website.

Step 1: Initial Gateway Connection & Login

First, we need to get into the EG5120's command center.

  1. Power up the EG5120 and wait a minute for the system to fully boot.
  2. Connect the gateway to your computer using an Ethernet cable.
  3. Configure your computer's IPv4 network card settings to obtain an IP address automatically via DHCP.
  4. Open a web browser and navigate to the Home Assistant URL provided with your gateway's software stack, which is often http://192.168.0.1:8123. Create your initial user account here; we'll need it for the next step.
A screenshot of the Home Assistant onboarding welcome screen shown in a web browser. The title reads "Welcome!" with the prompt: "Are you ready to awaken your home, reclaim your privacy and join a worldwide community of tinkerers?" Below this, there is a prominent blue button labeled "CREATE MY SMART HOME." Other options include "Upload backup" and "Home Assistant Cloud" for restoring existing configurations. At the bottom are links to "Read our vision," "Join our community," and "Download our app." The browser address bar shows a local IP address and the connection is marked "Not Secure."

Step 2: Installing via HACS

First, we need to get the necessary components installed through HACS.

  1. Navigate to the HACS page from your sidebar. In the search box for integrations, type config edit. Install both File editor and config editor card. You've now added the core back-end and the front-end card for your new Home Assistant file editor.
Screenshot of the HACS interface in Home Assistant showing the installation of the file editor add-on.

Step 3: Adding the Editor to Your Dashboard

With the backend installed, the next step is to make it visible and functional on your dashboard.

  1. Restart Home Assistant to ensure the new component is loaded correctly. You can do this by navigating to Developer tools -> YAML and clicking the RESTART button.
A screenshot of the Home Assistant web interface showing the Developer Tools page, with the "YAML" tab selected. The left-hand navigation menu highlights "Developer tools." The main content area has a section titled "Check and restart," which includes buttons for "CHECK CONFIGURATION" and "RESTART." A second section, "YAML configuration reloading," lists various configuration components that can be reloaded without a full system restart, such as "ALL YAML CONFIGURATION," "AUTOMATIONS," and "INPUT BOOLEANS."

  1. Now, navigate to Settings, then click on Devices & services. On the Integrations page, click the ADD INTEGRATION button in the bottom right corner. Search for and add the File editor integration you just installed via HACS.
  2. Go back to Settings, click on Dashboards, and either select an existing dashboard or add a new one for your editor.
  3. Navigate to the dashboard you just selected. Click the edit icon in the top-right corner, add a section, and then click ADD CARD. Search for the config editor card and add it to your view.

And that's it! You should now see a new card on your dashboard with a dropdown menu. You can select configuration.yaml or any other editable configuration file to make changes directly.

The Home Assistant dashboard displaying the newly added file editor card, with the configuration.yaml file open.


FAQ

Q1: Is editing YAML files directly in the browser safe?

A1: Yes, it's generally safe. Home Assistant has a built-in configuration check that you can run before restarting. It's always a good practice to use this feature (under Developer Tools -> YAML) to validate your changes and prevent a failed restart. For more on industrial security best practices, you can review standards like IEC 62443.

Q2: What's the difference between this file editor and the official "File editor" add-on from the Add-on Store?

A2: They achieve similar goals! The official add-on runs in a separate tab as a full-screen editor, while the method described here integrates the editor as a "card" directly into your main dashboard (Lovelace UI). It often comes down to personal preference—some people prefer the integrated card for quick edits, while others like the dedicated page of the official add-on.

Q3: Can I edit any file with this Home Assistant file editor?

A3: You can edit the files that Home Assistant's permissions allow, which typically includes your entire configuration directory (where YAML files reside), but not system-level files of the underlying operating system. This is a security feature to protect the integrity of your RobustOS Pro system.