
How to Remotely Connect to Your Raspberry Pi (The Professional Way)
|
|
Time to read 6 min
|
|
Time to read 6 min
If you've ever built a Raspberry Pi project, you know the frustration of it going offline when you're not there.
This guide provides a professional solution to remotely connect to your Raspberry Pi . We'll show you how to use a powerful industrial cellular gateway, the Robustel R1520, and the RCMS platform to create a secure and persistent connection. Forget unreliable Wi-Fi or complex dynamic DNS setups.
This step-by-step tutorial will walk you through creating a secure VPN tunnel, giving you stable SSH and VNC access to your Raspberry Pi from anywhere in the world.
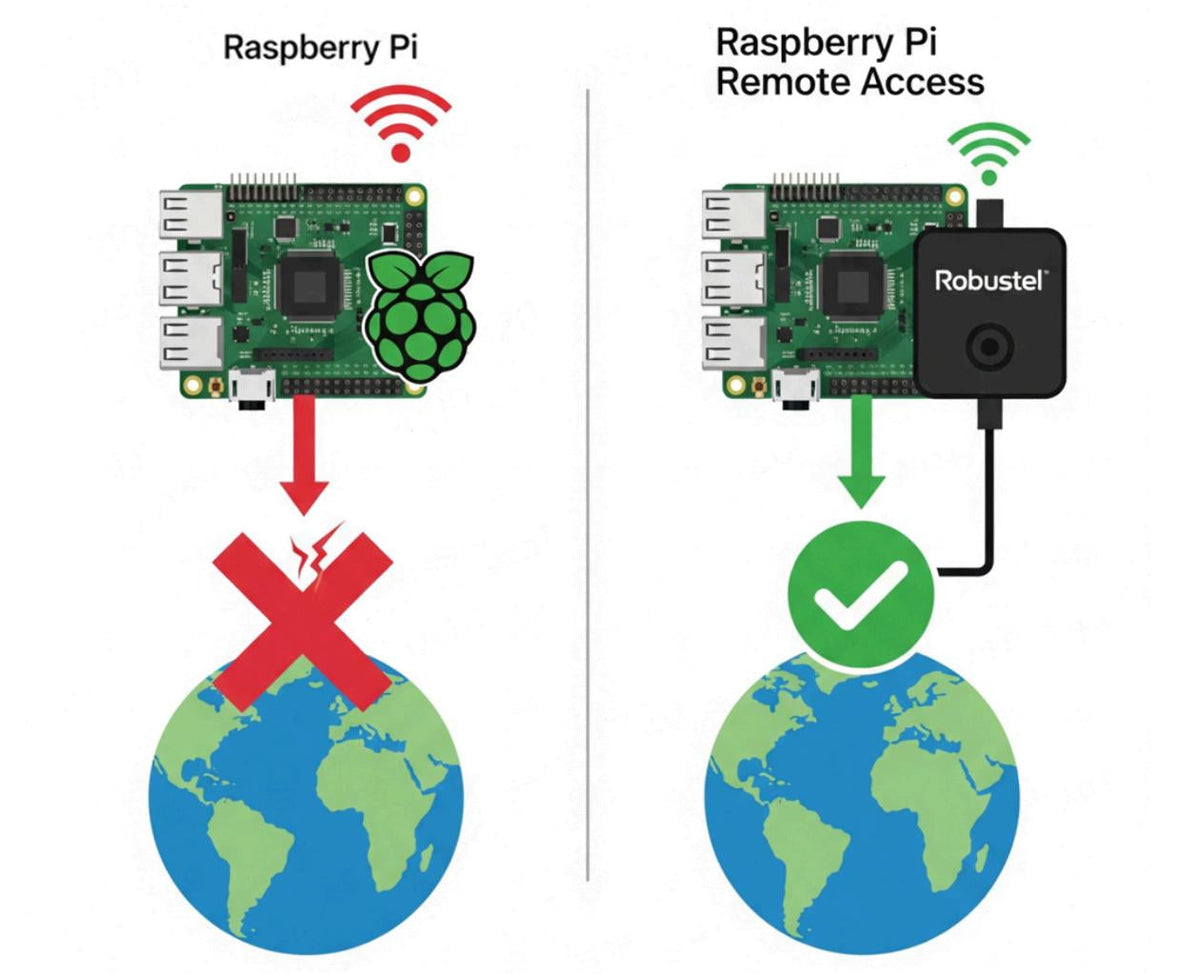
I can't tell you how many times I've spoken to a frustrated engineer or maker who built a brilliant Raspberry Pi project, only to have it drop off the network hours after they've left the site. The project works perfectly... as long as you're on the same Wi-Fi network. But what happens when you need to access it from home? Or when the local Wi-Fi goes down?
This is where many promising IoT projects stall. The solution isn't to give up on the Pi; it's to give it a professional-grade connection to the world. The answer lies in pairing your Raspberry Pi with a true Industrial IoT Edge Gateway . In this guide, we'll answer the question of how to remotely connect to a raspberry pi in the most reliable way possible.
When users search for the raspberry pi best app to remote connect, they're often looking for a software solution. But for true reliability, the "best app" is actually a combination of professional hardware and a powerful cloud platform. Here's why using an industrial gateway is superior to a simple software tool or mobile hotspot:
Let's be clear: a single point of failure is unacceptable in a real deployment. The R1520 features dual-SIM automatic failover . If one cellular carrier's network drops, it instantly switches to the other, ensuring your Raspberry Pi stays online. A standard USB dongle can't do that.
Connecting your Raspberry Pi directly to the internet is a massive security risk. An industrial gateway like the R1520 acts as a hardened security guard. It has a powerful stateful firewall and allows you to build secure VPN tunnels , so you never have to expose your Pi's SSH port to the public internet.
This is the real game-changer. The R1520 is managed by the Robustel Cloud Manager Service (RCMS) . This platform is the key to how you'll remote connect to your Raspberry Pi easily and securely.
This guide will walk you through the entire process of setting up secure remote access.
1 x Raspberry Pi (any model with an Ethernet port).
1 or 2 x Active SIM cards with a data plan.
An active RCMS account (you can register for free).
Basic familiarity with the Raspberry Pi's command line and networking settings.
(Note: The following configuration section is kept structurally intact for screenshot placement.)
First, let's get the physical connection established.
Insert your active SIM card(s) into the R1520 and attach the cellular antennas.
Connect your Raspberry Pi to one of the LAN ports on the R1520 using an Ethernet cable.
Power on both the R1520 and the Raspberry Pi.
Log in to the R1520's web interface (default IP: 192.168.0.1) and ensure it has established a cellular connection to the internet.

Now, we'll add the R1520 to your RCMS account.
Log into your RCMS account.
Navigate to the Device List and click "Import" or "Add Device."
Enter the Serial Number (SN) and IMEI of your R1520, which can be found on the device label.
Log in to the R1520's web interface, navigate to Services -> RCMS , and ensure it's enabled and showing a "Registered" status.

This is the core of our secure remote access solution. We will use RCMS to create a virtual private network.
In RCMS, navigate to the RCMS RobustVPN section.
Click "Add" to create a new VPN network. Give it a descriptive name (e.g., Pi-Remote-Access).
In the VPN configuration, add the R1520 gateway from your device list to this VPN network.
Once created, RCMS will automatically push the VPN configuration to your R1520. After a minute or two, the status should show as connected.

With the VPN active, your computer (running the RCMS RobustVPN client) and the R1520 are now on the same secure, private network. The R1520 assigns a virtual IP address to your Raspberry Pi.
1. In the End Device Management section of the VPN, add the IP address that the Raspberry Pi obtained from the R1520 via DHCP (e.g., 192.168.0.51).

2. Run the RCMS RobustVPN client on your computer, log in to your RCMS account, then click "Connect" on the VPN tunnel created in Step 3.

3. For SSH Access: Open your SSH client (like PuTTY or Terminal) and connect to the Pi's local IP address.
Bash
ssh pi@192.168.0.51

4. For Web GUI or VNC Access: For the Raspberry Pi device's web service, it can be accessed using its local IP address and port in a browser (e.g., http://192.168.0.51:8080). The following demonstrates remote access to the Raspberry Pi desktop via VNC.

You now have a secure, reliable way to remotely connect to your Raspberry Pi from anywhere in the world!
Learning how to remote manage a Raspberry Pi with professional-grade tools is a game-changing skill. By pairing your Pi with an industrial cellular gateway like the Robustel R1520 and a powerful cloud platform like RCMS, you solve the fundamental challenges of connectivity, security, and reliability. This setup is the perfect first step in learning how to transform your innovative prototypes into robust, commercially viable products, setting you on a path for a successful career in the Industrial IoT.
A1: No, and that is a major advantage. Because the RCMS VPN creates an outbound connection from the gateway, this solution works perfectly even with private IP addresses assigned by cellular carriers, which is very common for IoT/M2M data plans.
A2: Yes, it is highly secure. All traffic between your computer and the Raspberry Pi is encrypted and travels through the secure RCMS VPN tunnel. The Raspberry Pi's SSH and web ports are never exposed to the public internet.
A3: Absolutely. You can connect multiple Raspberry Pis to the LAN ports of a single R1520 router, and they will all be accessible through the same secure VPN connection, each with its own IP address on the local network.


